Quantcast
Channel: Non-native Mommy
Viewing all 123 articles
Browse latest View live

We do NOT celebrate Valentine's Day anyway

$
0
0
February has arrived and Valentine's Day is only 2 daysaway. In Hungary people didn't celebrate it for a long time but nowadays it has become very popular. The only reason we deal with it at all is that E. can see a lot of shop windows where Valentine's Day decorations are diplayed and she is asking questions.

I've found some fun and useful activities online which have the symbols of this special occasion (hearts, roses, candies etc.) but the main focus is on something more educational.

In the last couple of days we've been working on these:

Valentine Patterns (from mrspspecialities.blogspot.com)

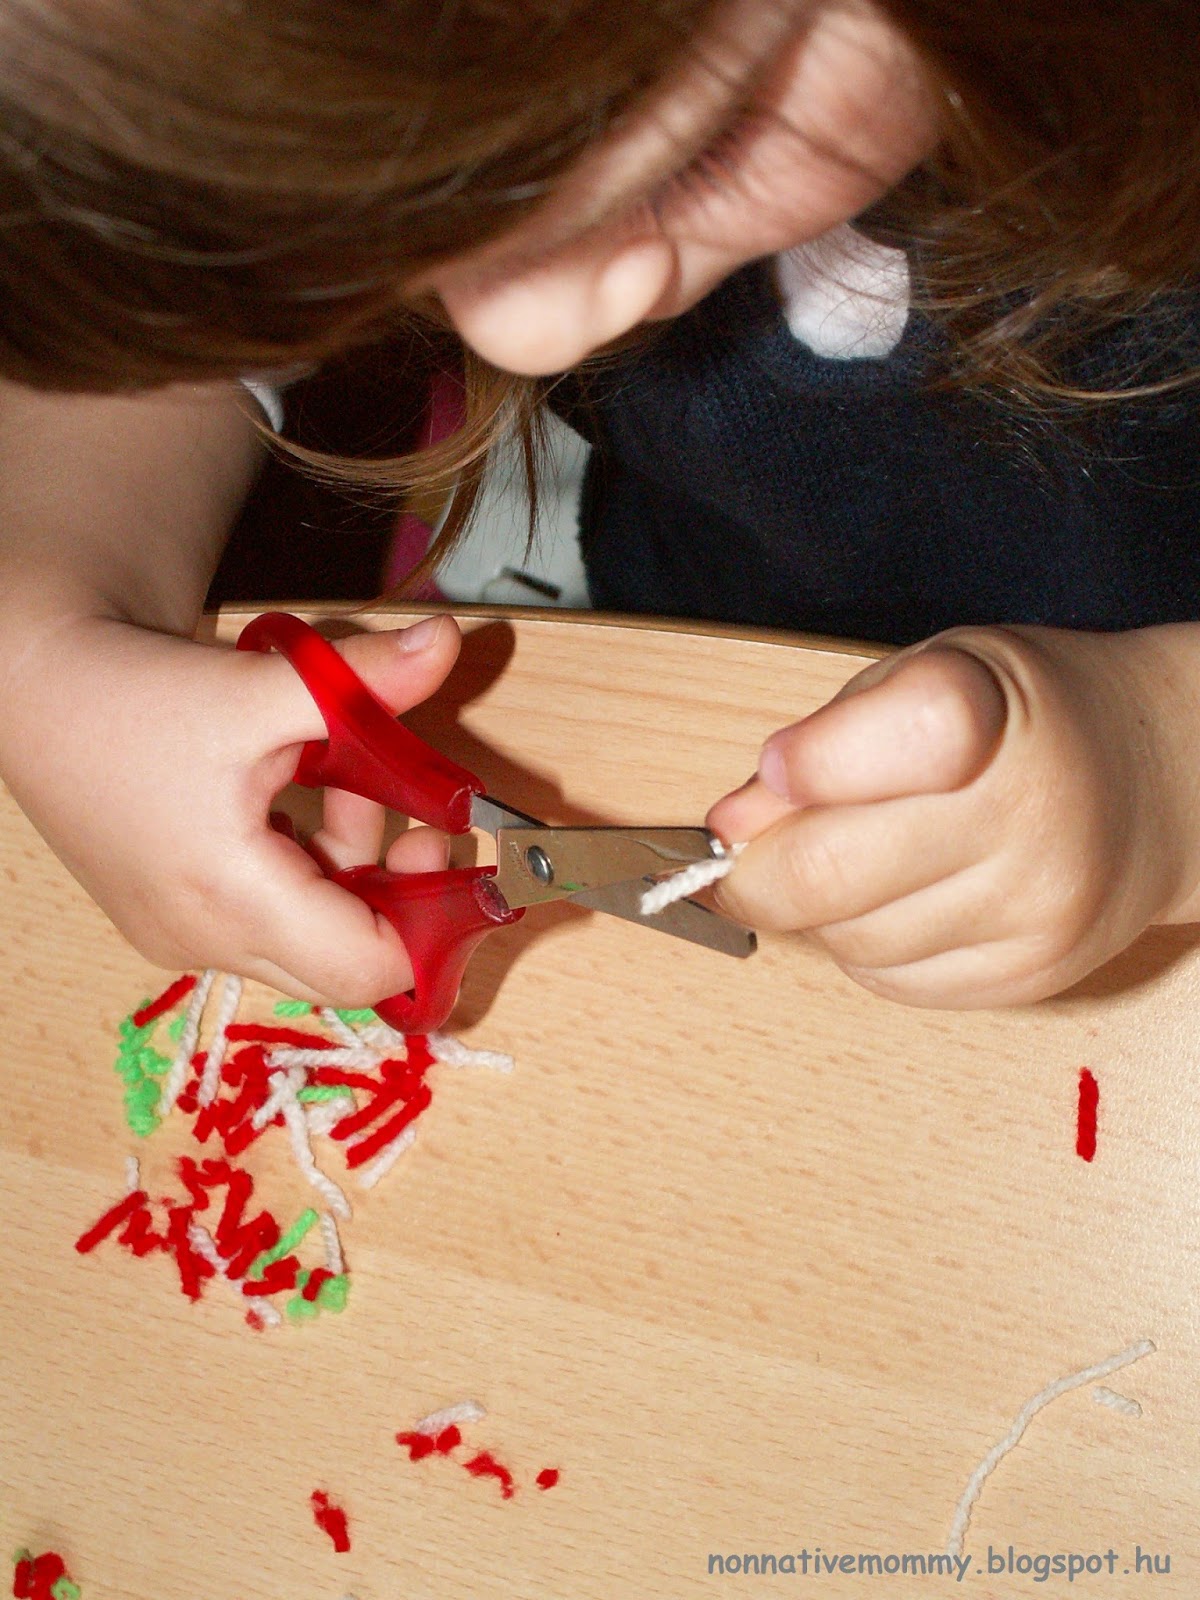
I downloaded the Valentine Patterns (freebie) and we cut them out together. This was the first time E. had been cutting properly, holding the scissors in the right way and actually cutting. What a breakthrough! I drew a smiley on her right hand thumb and she kept telling herself:


- Smiley up and I can cut.

Then we sat down to finish the patterns.

Cracked heart and broken heart
 She had no problems with the ABABAB patterns

Sweets or poops?
 ABBABBABB was a little more difficult
Little and big hearts
 ABCABC patters were challenging


But she got the hang of it by the end

Zig-zag, stripy and spotty hearts


Number heart match (numbers)

I'm getting more and more fascinated by a blog I've found recently. At Welcome to Mommyhood you can read about healthy foods, recipes for kids and toddler activities like the Valentine's Day number matching. This activity is more about numbers than about Valentine's Day.

I downloaded the printable, laminated and cut the hearts out. E. liked it a lot, though she missed the zero.


I gave her all the numbers from 1 to 20 as she is an "expert" at numbers, but if you are just getting to know the numbers, first give your child the numbers from 1-9 and later the bigger numbers. 19 and 20 were on a separate sheet, but we solved this problem easily. We just put them next to 18 :)

Look at her face :)


Heart colour gradients (from Welcome to Mommyhood)

E. knows her colours well but I haven't done an activity like this before. I found the heart colour gradient printable (free!) at Welcome to Mommyhood and I thought we'll give it a try. As this was the first time we'd done it I gave her only 3 shades then 4, but not all the six.

We also played a memory game. We turned up 2 cards at a time and we needed to name which one is dark or light (I used the darkest and the lightest colours.)


We really need to practise it more. It was a hard task, though she enjoyed it. (No photos of the memory game... sorry)

My Funny Valentine (art)

Super Simple Learning offers you a free printable Valentine's Day craft. You can make your own funny Valentine out of eyes, noses and mouths. A great number of other Valentine's Day activities are available there, like colouring, action songs, connect the dots activities etc.

I picked My Funny Valentine as we could talk about body parts and colours, and we could use the glue for sticking. E. loves them all.

Here is the activity step by step:


1. Paint/colour the hearts (so they'll dry until you get to the sticking part)

2. Colour the body parts


3. Mommy (or bigger kids themselves) can cut out the body parts

4. Use glue to stick the body parts on you heart(s)


5. Display it somewhere you and your child can rejoice at the final result


Extras: You can draw ears or hats/tiaras/crowns or add some presents in the other hand. You can also add a speech bubble and write in what your message is for your loved one.We didn't do any of them as the activity was long enough for E. and she wanted to stick them on the door as soon as she finished with her hearts.
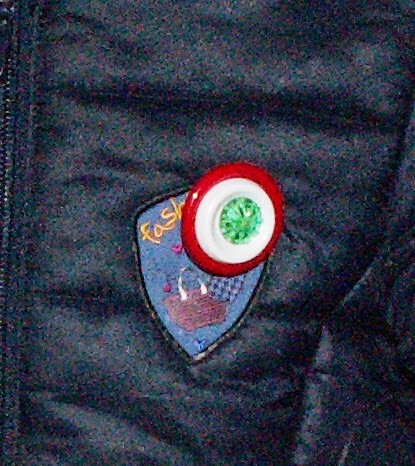
Button heart (art)

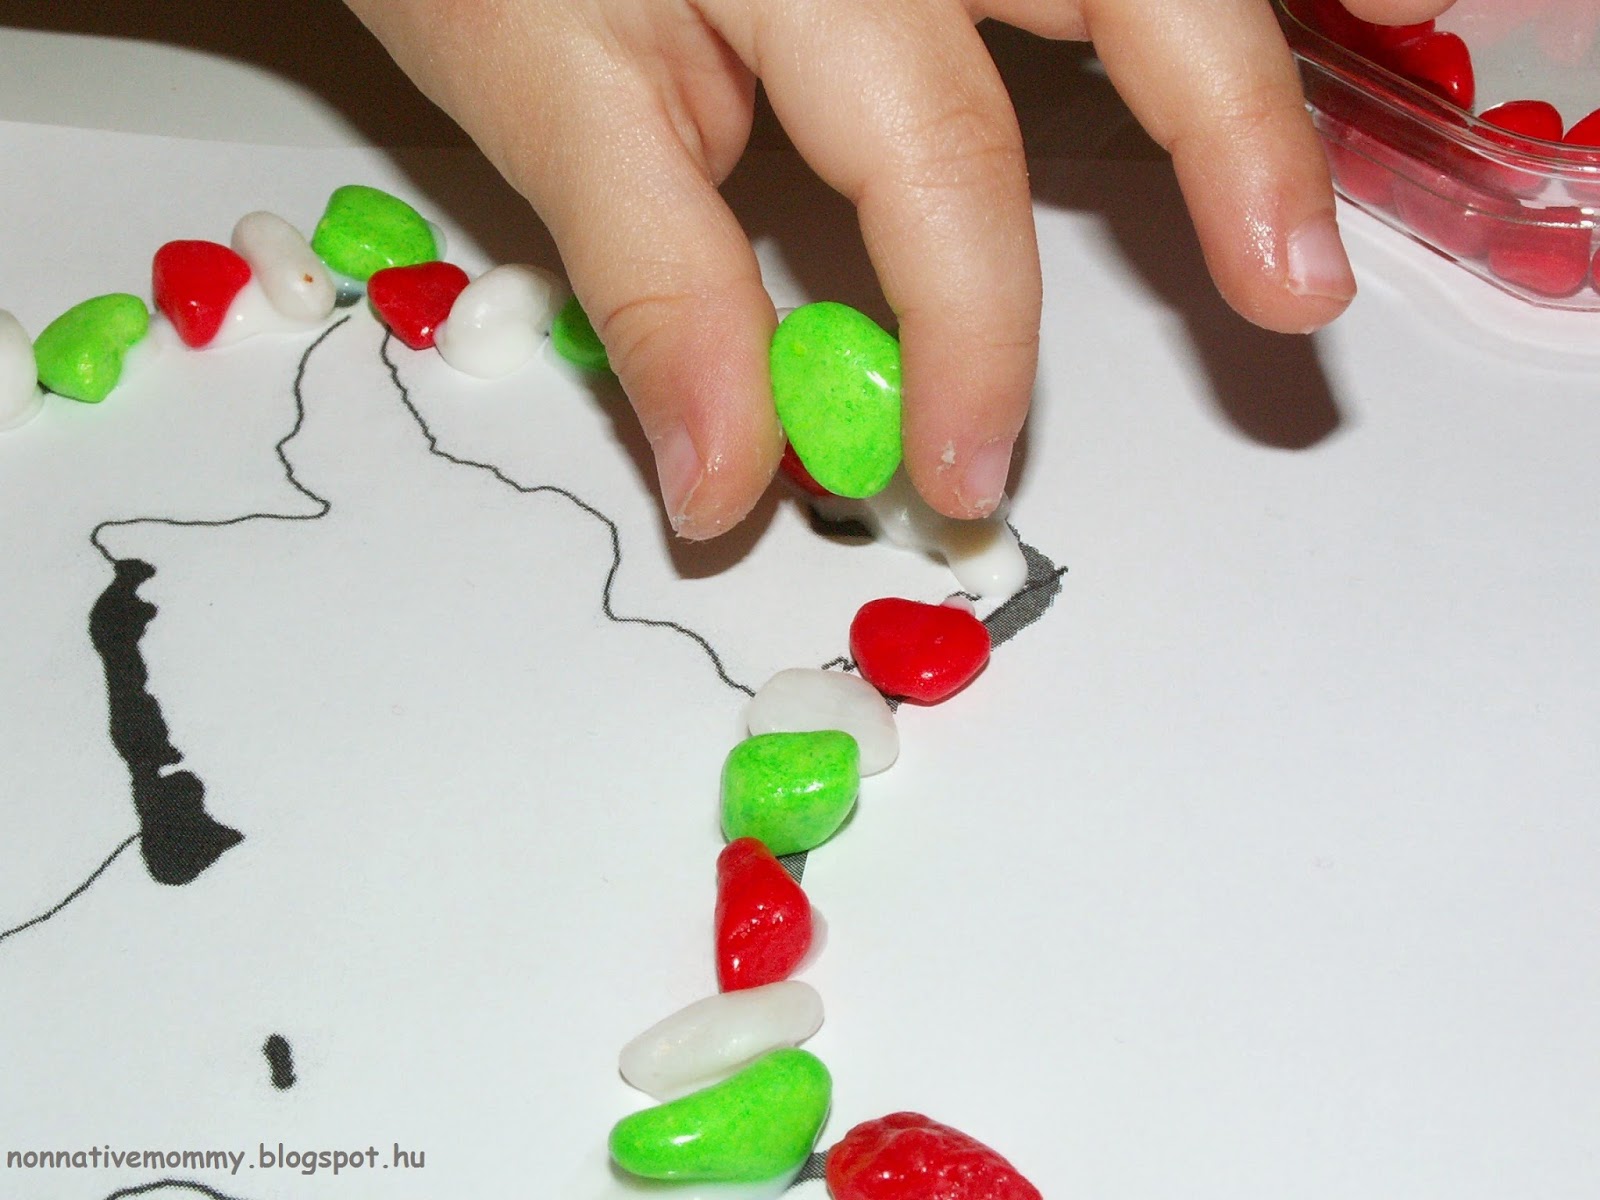
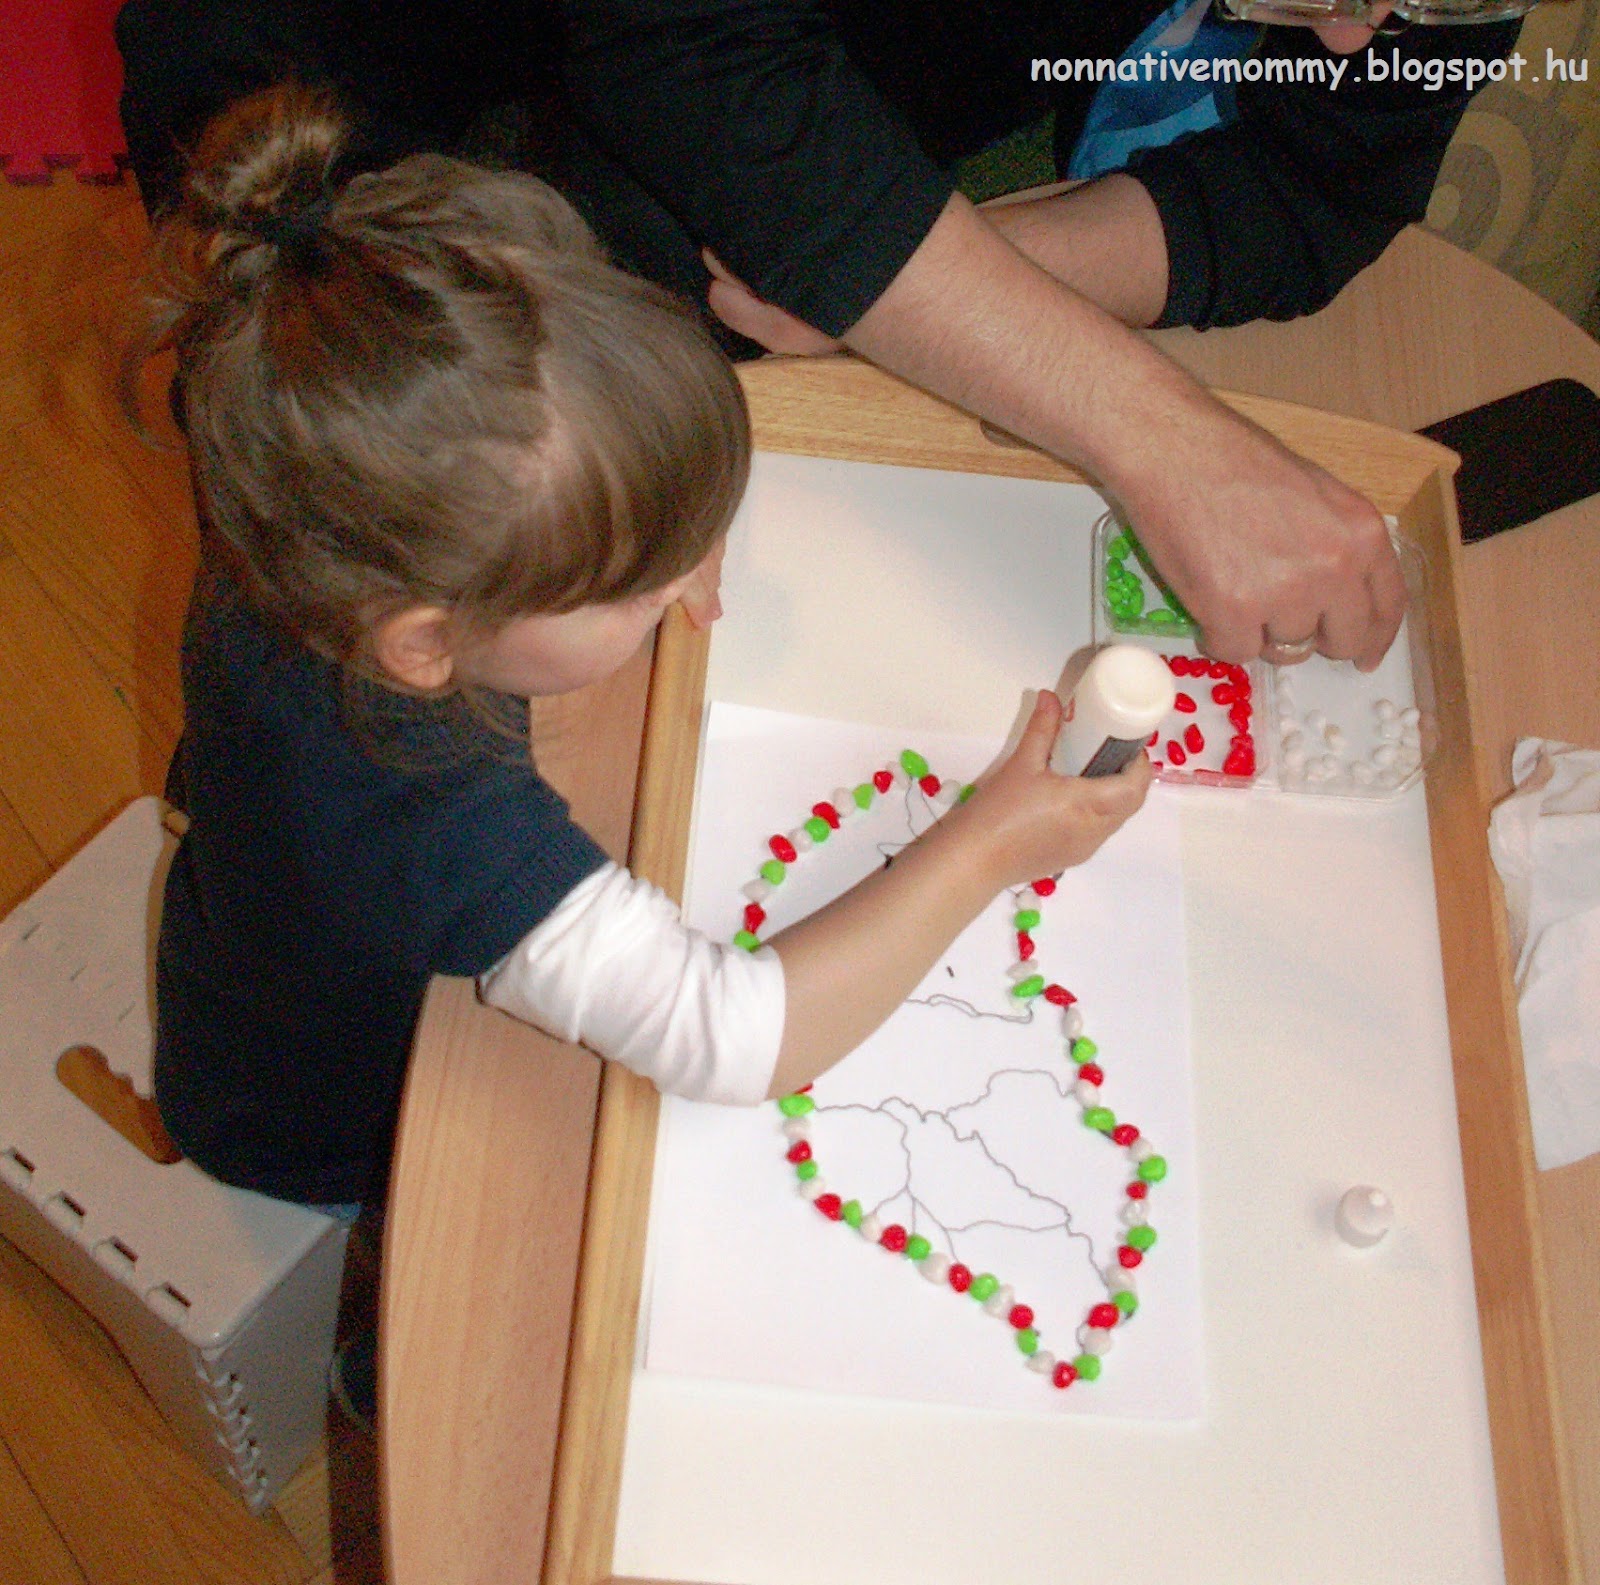
We are in the gluing phase. No matter what we glue it's fun. So I drew 3 hearts on a sheet of paper and put some colourful buttons (that I found in my treasure box) in a bowl, plus the glue and a fun could start.


As we were doing some patterns I started the big heart with blue and white buttons and E. finished it.


Unfortunately we didn't have enough buttons of the same colours so we needed to change the patter in the case of the smaller hearts.


E. had no patience to make more hearts so we stopped the activity. But the next day she asked me to do something with the other 3 hearts. I just threw some confetti, beads and leftover craft stuff in a bowl and give it to her to stick. I had 10-12 minutes of freedom.


Although we signed Valentine's Day in our calendar we won't celebrate it (no presents, no flowers, no chocolate etc.). It's not our holiday...

Anyways, happy Valentine's Day!


Our First St. Patrick's Day - the Irish flag and symbols

$
0
0
Last year we didn't celebrate St. Patrick's day as a Hungarian national holiday (March 15) is very close  to it. This year I decided to celebrate both with some fun activities as E. can take more.

Irish Flag

First, we talked a little about Ireland. We took a look at the Picture Atlas E. likes so much. She pointed at the flag and the capital. We also talked about what animals she could see there on the island. (I also mentioned to her that I lived there for a while but she was totally unimpressed)


Then we went on to the flag. She got excited as soon as she saw the colourful stickers. I made the flag and I found some price tag stickers in a One Euro shop.


She immediately started to do the sticking saying: - G is for green and the Os are for orange.
At first she didn't understand what she would stick on the white part of the flag. She was a little disappointed when I told her to leave it white and there would be no sticking in the middle.


Some white parts are left among the stickers so it gave us a great chance to colour that E. doesn't like that much. I made sure that she needed to practise a little sharpening too.


She was really happy when she finished colouring. I must admit I had to help her a bit.


However, she proudly stuck it on our living-room door.


St. Patrick's Day Cutting Practicevia Welcome to Mummyhood

Using scissors is a new skill we've been trying to practise lately.


I had a very easy task with this: print and cut. I just needed to sit back and watch my daughter focus really hard on cutting along the lines.


Of course, we discussed what the things are in the pictures (pot of gold, rainbow, shamrock). I really hope that the book about the leprechaun (that I'd ordered via bookdepository.com with free delivery) will arrive before or on St. Patrick's Day.


Mosaic paper shamrock (via Happiness Is Homemade)

I myself drew and cut out a shamrock of cardboard that I found at home. I would have been better off with green construction paper or cardstock and a template, but the result was okay.


I also prepared cut-up pieces of all kinds of green paper (old wrapping paper, leftover construction and scrapbook paper etc). If you have an older child you can do the cutting together. Mine turns 3 in May so I decided on cutting the squares myself.

When she saw the layout she was delighted. She could stick all day.


You can also use glue stick that dries clear but I like the idea of E. using her hand muscles when squeezing the liquid glue bottle.


Final results: the left one is mine the right one is E.'s


 As in the morning we were drying Rabbit's hair (-pretend play I'll write about later) the hairdryer came handy to dry excess glue.


Before sticking them on our living-room door I turned the shamrocks upside down and trimmed off the overhanging edges.


Was it fun? ;)


More to come in the next post:

  • Rainbow name puzzle
  • St. Patrick's Day Patterning
  • More shamrock sticking out of heart and triangle shapes
  • Book review on St. Patrick and the Leprechaun
  • surprise :)


St. Patrick's Day vocabulary to practise:


St Patrick's Day Phrases Eng-Hun.pptx

St. Patrick's Day Patterning Printable

$
0
0
I've managed to prepare my first FREE printable. I'm not very good with computers but I managed to put together this Saint Patrick's day patterning activity for E. as lately she's been really into pattern activities. It is also available for you to download.


You just need to print and cut it out, if you want it to be more durable, you can also laminate the cards.

E. enjoyed it a lot, though she found it hard to pronounce leprechaun. I'm not surprised. (Unfortunately The Story of The Leprechaun book I ordered hasn't arrived yet.)

The ABABA patterns and the ABBABB ones went easily.


Though the ABCABC pattern was quite a challenge.

Whoops! Wrong...

That's it!

After having finished the patterns we played a memory game with the extra cards.

Lep.. lepr.. Mommy, you say...

Match!
You can download this free St. Patrick's Day Patterning printable below:


St Patricks Day patterning.pptx

Rainbow, Pom-poms and shamrocks for St Patrick

$
0
0

More and more St. Patrick's Day stuff. If you haven't done anything in your home that is colourful, shamrock-shaped or fluffy, then have a look at our collection.


Rainbow Name Puzzle (via Still Playing School)

What you need:
  • 7 coloured craft foam sheets (red, orange, yellow, pink, green, blue, purple)
  • printed rainbow template
  • 2 clips
  • 1 pin
  • scissors
  • marker

Still Playing School didn't go into details how to cut the foam so they fit together nicely so I came up with my own idea.

I placed the printed rainbow template on the foam sheet and fixed it with 2 clips


 Then I used the pin to pierce through the paper (and the foam sheet) along the line


You can see here that it is much easier to cut out the strips along the holes


It takes time but it's worth it


Our foam rainbow with Patrick and rainbow on one side and my daughter's full name on the other side.

When I first show her the strips she was puzzled and a little frightened as they were wriggling in my hand. But as soon as I put the colourful strips down on the table she loved them.


 She needed to concentrate hard on putting them in the right order according to their size


 In the end she spelled the letters then I read them out.


We'll play more with it. Rainbow in the bathtub is on our list.

Pom-Pom Colour Selection with tongs

To extend our colour activity I gave E. some pom-poms of 3 colours (of the Irish flag): green, white and orange. With the tongs she separated them in 3 groups.
Easy to prepare and a popular activity with my daughter.


Number practice

I also wanted to do some tasks with numbers involved as my little one loves numbers. I was hesitating between these great number cards by Welcome to Mummyhood


and a number activity from Pinay Homeschooler's St. Patrick's Day Unit.

StPatrickDayTinyTots

As I couldn't find nice and St. Patrick related (shamrock shaped or horseshoe) counters and I didn't want to cut out numbers, I picked the latter.

From the unit above I printed the number cards and laminated them. From Christmas time I had some green counters.


E. did this activity with Daddy as we've been having a bad cold. Although she's better now I haven't had time to relax a little and get my strength back. So I decided to take a little rest in the afternoon. I prepared everything for them in advance.


They named the object/things on the card. E. counted them and placed the counters on the right number. It took her 3 minutes to finish. She knows  her numbers. They left the cards on the table for me to have a look at the great work they'd done. How cute!

Heart-shaped Shamrock Leaves

I cut out a lot of heart shapes and some triangles. I used green construction paper and presented them like this with an example she can follow.


Daddy supervised this activity, too and they had lots of fun. And did a little drawing as well.


As they put the shamrocks under one another I placed them in our St Patrick's Day corner as a banner.


We've been doing loads of activities lately. Not only these ones but other fun tasks concerning our National Holiday coming on 15 March. I'll come back with some Hungarian Revolution related activities for the Hungarian Moms. Stay tuned!


Hungarian National Holiday- March 15

$
0
0
One of the biggest national holidays in Hungary is the commemoration of the Hungarian Revolution of 1848. As it is filled with national feelings and politics I won't go into details about history and other stuff but I'd like to show how we prepare for it in our home (this year together with St. Patrick's Day)

The activities we have done are in mainly Hungarian.

How do we prepare for a Hungarian and an Irish celebration at the same time? We are sharing time between English and Hungarian. Let's say in the morning we do tasks in English concerning St. Patrick's Day. In the afternoon we spend time in Hungarian doing some fun activities around the Hungarian Revolution. Or the other way round.

We display the art E. makes on our double doors in the living-room.

One wing is dedicated to the Hungarian Revolution, the other one to St. Patrick's Day.

St. Patrick's Day door wing on the left, Hungarian Revolution door wing on the right

In this way she is not confused at all.

I'd like to list some ideas I found online or we made up ourselves concerning our national holiday. This blog wouldn't be complete without our Hungary/the Hungarian language related happenings.

Luckily, last year I made our own button cockade. There's nothing to do with it this year. We'll just pin them on our coat on 15 March. (I hope I'll find them)

E.'s coat and cockade from 2014

It is made out of 3 buttons: a big red, a smaller white and a little green button. I sewed them together with a pin like these:


Colouring the flag is the most traditional way children prepare for this holiday. We put some fun into it. Thank Goodness for dot markers!

When she saw the sheet E. asked me who wrote there "MAGYAR ZÁSZLÓ" (=Hungarian flag)


With dot markers all kinds of colouring is more fun. E. did some more of it (colouring a KOKÁRDA=cockade, for example)

Daddy and E. were colouring in full fling so I printed them a map of Ireland and they coloured it too. You can see it in the top picture on the St Patrick's side. (They didn't really care about Northern Ireland. We'll put things to rights next year, when she'll be more capable of understanding it.)

Red, white and green are used in almost all of our activities. I bought some decor stones in a One Euro Shop (I had to separate the red, white and green stones from many other colours)
We printed the map of Hungary and made up a kind of patterning activity.


The stones had to be placed along the borderline as on the Hungarian flag (red, white, green) making a pattern ABCABC. This pattern is difficult for my daughter to follow so it was quite a strenuous exercise for her.

I'm concentrating like there's no tomorrow


It was a long activity and towards the end it was difficult for her to concentrate. This is quite understandable, she's not even 3. But Daddy was there for her.


Pinterest offers a lot of wonderful ideas for the occasion. For instance, this pom-pom garland with the national colours. (Through the link you can read about the detailed explanation how to make a pom pom with the help of a fork)

What you need:

  • red, white, green (and orange) yarn
  • a fork
  • scissors

E. tried to make a pom-pom, but she couldn't. Maybe half a year later she'll understand how to do it and will be able to make it. We'll give it a try again.

So I made the pompoms myself....


At first, she was just playing with the yarn.

then she was cutting the yarn like a maniac :)


She cut the yarn for 25-30 minutes and I could finish the garland with the Hungarian colours only.

The next day I made the pom-poms for the Irish garland and she was .... *surprise, surprise* cutting the yarn. She can't get bored of it. E. kept asking: - What I'm doing? which I rephrased:- What am I doing? And then she answerd her own question after having repeated it correctly. - I'm cutting yarn. 
This short conversation was repeated for 8-10 times without any alternation.


We've hung our pom-pom garlands (with the Irish and the Hungarian national colours) on the double doors.


Tricolour Pizza

Your toddler ALWAYS wants to help you with cooking, not to mention the great excitement if you make pizza. Why not in tricolour? Everybody loves pizza and it's easy to make it with a toddler.

Ha még nem tudod mit ebédeljetek holnap, akkor íme egy ötlet. A pizzát mindenki szereti, nem? A nemzeti ünnep tiszteletére egy kis átalakuláson ment keresztül, és zászló lett belőle!
It's not our pizza, but it's coming soon

Red= tomato sauce with some basil and oregano (minced meat if you wish)
White= loads of grated cheese
Green= broccoli, spinach or any other green vegetables in our case it'll be ruccola

The lollipop stick is optional, too... but don't they look cool? Like real flags :)

We are making our own on the 15th so I can upload photos of the process later.

I still have some activities up my sleeve, however, I'm not sure we'll have time for them. Anyways, I'll have to share some ideas next year too.


Ice experiment with tricolor beads

$
0
0

During winter time we had some ice fun I didn't write about as it wasn't really planned. But now, inspired by Yuliya, the writer of Welcome to Mummyhood, I decided to go for it again.

We've altered the task she introduce on her blog to suit our Hungarian National holiday and I used red, white and green IKEA beads instead of sequins.


E. filled up the ice cube tray with the beads.


Then she poured the water (the beads are so light that they were floating on the top.)


After that we put the tray into the freezer. We checked it on the same day whether it was frozen or not, but we had no luck.

We did this preparation in Hungarian and talked about the colours of the Hungarian flag and how water turns into ice under 0 Celsius degree. She listened closely and asked questions about what liquid is and what frozen means. I gave her a basic explanation.

The next day we took it out of the freezer and I set up this tray for E. We were in English this time.


She was amazed as soon as she saw the tray.

First, she was a little hesitant what to do. But then she got the hang of it.

She used all the tool (tongs, fork, spoon and ladle) I prepared for her. Picking, spooning, ladling. First, she was touching the ice cubes with her hands. Abruptly, she said: - It's cold and wet. I don't want to be wet. 

And she picked up her favourite tool, the tongs.


And she was bewildered by the chemical reaction.


She was playing with it for 40-45 minutes. Mostly alone or with very little assistance.


Once she tasted the baking soda. Nothing happened, of course, and when I asked her if it tasted nice, her answer was positive. Luckily, she didn't try it again.

Before her nap time, she was asking about the ice experiment (vinegar and experiment are words that gave her a hard time to pronounce. Once she said ligament instead of vinegar... haha. So cute!)

All in all, it was a wonderful experiment, loads of fun and a lot of new vocabulary learnt in both languages. We'll definitely do something similar again. I was thinking of volcanoes...

Here are some vocabulary/phrases connected to our experiment:


Ice experiment.pptx

Easter 2014 - a very belated post

$
0
0
I was going through my blog and I was shocked to see I'd forgotten to write a summary of our Easter last year. I posted a lot of ideas and activities on my facebook page, but no summary here whatsoever. I need to make up for this shortcoming.

A quick post in pictures...

Inexpensive Easter gift tags. After having taken them out of their basic sheet I photocopied them and stick a picture in each place. E. had to match them.


Washi tape/Decor tape eggs - I covered some egg-shape cutouts with colourful washi tapes and decor tapes. Then I laminated them and halved them in different ways. Also, I wrote numbers on them from 1-10. She loved this activity and I'm sure we'll do it this year too.


Easter basket - details in the pic


We painted some foam eggs. Additional fun with some beads and feathers. 


Concentration on full blast


Easter gift hunt in the playground nearby
Five minutes before my husband and daughter, I went to the playground and spread some gifts in the grass (as we have no garden this seemed to be the best solution for making an egg hunt happen)
Then they came and E. hunted
Ready for the hunt with the home-made basket

A magnetic drawing board

Spot's First Easter

Stickers

Opening an Easter (surprise) egg

Let's not forget about the Hungarian tradition: Easter sprinkling


All the presents E. hunted and got from the grandparents last Easter


I hope this little retrospection will give you some ideas for this Easter. For me it was great pleaseure to look back on what happened a year ago. I'll be back with more activities we're doing for this Easter.

Easter Bunny and chick craft

$
0
0
This year I have hardly any time prepare with Easter activities. My main focus was to find fun crafts that are easy to prepare and I can find the necessary supplies here at home. (okay, okay, I did a little shopping for eggs and other decorations.)

Pussy/goat willow (Barka in Hungarian) Easter Bunny 

I bought some branches of pussy or goat willow. Honestly, I hate the English name of this beautiful plant, so we just call it catkin, the name referring to this kind of flower.


Anyway, I picked the catkins off the branch, placed them in bowl. I printed a bunny (more precisely 2 types of rabbit colouring pages) from the net and stuck it on card stock. I also added some glue and the fun could begin.


My daughter's idea of fun was different. After having stuck 8-10 catkins on the body of the bunny she told me: - Let's do it tomorrow.


Then she left. She tried it with Daddy the next day and they finished the rabbits more or less. The heads were missing.


We are almost there

So on the third day we managed to finish the whole rabbit.


Split pea chick (Sárgaborsó csibe in Hungarian)

On our usually grocery shopping I picked up a bag of split peas forgetting that E. won't eat it, so I used some of the split peas in our craft. Again, I just printed a chick from the net served E. with the split peas (raw) and glue.


After applying the glue all over the chick she enjoyed throwing the split peas on the chick, then pouring the excess back into the bowl.


The final art pieces have been stuck on our living-room door.

I took the ideas (Catkin Bunny, I couldn't find the Split Pea Chick idea again) from Pinterest collections on Easter crafts.

HOPPY EASTER, EVERYONE!

Easter egg crafts

$
0
0
There's no Easter without eggs. Egg painting, egg making, blowing out eggs, eating eggs, sticking egg, decorating with eggs and so on.

Here are a few things we've been doing with eggs lately.

Decor tape eggs

Just draw an egg and supply your little one with some decor tape or washi tape. Be prepared: tape will be everywhere. In hair, on clothes and some on your drawn egg, too. If you want to save a pretty decor tape, do NOT give it into the hands of a 3 year old (or below).


A lot of cutting is involved, which is great practice for little hands.


If you put it around the house all your guests can admire the final product


Dot marker eggs

The original plan was to follow some patterns (ABAB or ABBABB), but it didn't work that way. I plan something and E. thinks differently. So we went with the flow. Some hand painting, making fingerprints, drawing lines, colouring freely etc.


You can print or draw and egg shape and provide your child with dot-markers


Pom-pom painting 

This is a variation of the dot marker painting. If you don't have dot markers use pom-pom and clothes pegs.

First, E. started to use the colours one by one (although she was drawing with the pom-poms like with a paintbrush; she refused to make dots like with the dot marker)


Then colour mixing kicked it


I was crazy enough to let her sprinkle a little glitter over the wet, painted eggs (well, never again, it's more than MESSY). I must admit she helped me happily with the cleaning up.


After they have dried I cut them out, added a ribbon and stuck the on the door frame in our living-room.


Of course, we had some traditional egg painting (with blown out eggs and acrylic paint, which E. calls "the big girl paint"). On Sunday during church time, children could paint eggs. There and then we tried wax crayon drawing and painting on eggs for the first time which is beautiful. I have a plan for next year's egg painting.

According to the Hungarian tradition, we also decorated a bunch of goat/pussy willow (which we simply call catkins) with eggs and other ornaments.


I hope you've had an EGG-cellent Easter!

FAQ

$
0
0
In the last couple of weeks I have bumped into a lot of mums who asked me similar questions about raising our daughter bilingual in a totally monolingual environment. So I collected a bunch of questions and my answers to them with some links from earlier blog posts:

  1. Do you speak to her English only?

    No, I don't. I can't do that. My mother tongue is my mother tongue, no matter how high my level of English is. (High level of language command is relative. I always feel my English is deteriorating.)

    I assigned certain times to speak English. When E. was a baby we had a timetable which meant that we used a little bit more English than Hungarian as she spent loads of time with me. Then we needed to change our schedule, still we had 50-50 % balanced language usage. (When she was around 2). Nowadays, (she's almost 3) we are in trouble with the balance between the two languages as we do not spend so much time together therefore there is less English in her life. BUT! Her English basis is so strong that she asks for changing languages when she feels she misses one of them (it's usually English)

    Even today, whenever there are just the two of us she says: - Uh-uh, Mommy. We need to change into English. We are just two.
    or
    - I've already changed into English, because there is only Mommy and I.

  2. When do you speak English to her and when Hungarian?

    There are many methods you can follow. What I use is a special one: I call it the timetable method. By now we don't have a timetable any more. Whenever we can, we speak English, as the Hungarian input of the environment is too influencing.

  3. When did you start talking to her in English?

    When we took her home from the hospital. At first, I was just singing songs and chanting rhymes to her in English. I wasn't sure about what I was doing and it felt strange. Then I got some inspirations after having read some books and contacted some other moms in the same shoes. From the age of 6 months I've been talking to her in English just like in Hungarian.
     
  4. Wasn't she late with speech development?

    Not at all, although it would have been perfectly normal. She was about 1 year old when she could say 6-8 English words (and Hungarian ones too). Actually, her first word (bib) was in English. Of course, these words were fuzzy and not distinct for the untrained ears. But by the time she turned 18 months these words had become clear and a LOT more had been added to them. Not to mention, she started to build up 2-3 word sentences at that time too.

    I have to admit that the period between the age of 12 and 18 months was filled with more English sessions that Hungarian.

  5. Doesn't she mix the languages?

    She does! At first she didn't, however, nowadays more and more. I'm not worried about it... okay... I am a little bit concerned, but I know if we keep up the balance between the languages she'll have all the language tools in both languages to express herself. Most of the time she mixes Hungarian into her English because she doesn't know a word or she can't express something due to lacking a structure.

    Though it happens the other way round, too. She makes her grandparents puzzled when she asks for some stories with the telescope in it (mind you, pronounced it with a perfect British accent) or when she says she wants to play on the see-saw at the playground. Sometimes she names some bugs (bumble bees, wasps, ants) or plants (pansies, daffodils, shepherd's purse etc) she sees in the park in English. They can sort out this teeny-weeny language problem... for the time being.

  6. What do you do when she mixes the languages?

    I keep on talking in the given language. I don't change. And I do NOT advise you to let your child take the lead (although it is also an option.) I go on talking, let's say, in English when she says some Hungarian words or sentences here and there. If I know she could say it in English I ask back: - What did you say? or - What's that in English?

    If I am aware of the fact that she can't express herself, I simply repeat in English what she said in Hungarian. Some sources suggest not to make your child repeat a word or sentence, yet sometimes I ask her to repeat just to reinforce we use English and help her fix a structure she cannot use (at all, or properly). Nonetheless, I'm not forcing it. Normally, she repeats expressions after me by herself. If she doesn't want to, we move on.

    Also, you can pretend you do not understand what your child says, but in our case (we do not follow the One Parent One Language -OPOL-strategy; she can hear me talk both Hungarian and English) it wouldn't work as my daughter knows that I understand and speak both. The other problem with this could be that your child can get frustrated if he or she can't put an idea or a wish across.

  7. What English activities/programmes can you take part in?

    We used to have a native British nanny for almost 2 years. I'm really grateful for her as she meant that I could have some free time (cooking, washing, ironing, shopping, cleaning etc.) while I knew English was still in focus in my daughter's life. Now we are looking for a new nanny. If you happen to know someone in Budapest who would be interested I would appreciate it.

    I've organised a Mums' English Club (MEC) in the library nearby, where mums gather with their little ones and chat in English while the kids play away. At the end of our sessions we sing some English songs for the kids. An afternoon session of MEC is badly needed but I haven't had time to find a place where we could go free of charge.

    We've been taking part in the well-known Helen Doron School's programme since E. was 10 months old. We are planning to leave it, but I'll write about that in a later post.

    For almost a year we took part in a swimming course which was instructed both in English and Hungarian. We met there some non-Hungarian families who communicated mainly in English, so E. could hear during the swimming sessions that English is not just Mommy's crazy language.

    We also visited Rhyme Time sessions (singing and playing in English) for a few times, but we do not go regularly.

  8. Does Daddy speak English to her?

    He does. Daddy speaks a lot of languages, it's no problem for him at all. What's more, practising English regularly helps him improve his spoken skills as well. I suppose he also enjoys our English session;

    Again, at the beginning we did it differently. When Daddy arrived home from work we changed into Hungarian, but the whole day was in English. Nowadays, as I'm starting to work, E. is spending more time with the grandparents or she is in the nursery (not to mention that our native nanny, A. has left) we have been trying to fit in as many English sessions as we can.

    We have plenty of dinners, weekend programmes, playground visits, craft activities and bath times in English with Daddy. I'm very lucky, because my husband is very supportive concerning our bilingual project.

  9. Can she say sentences?

    Haha. This has been the funniest question so far I've received. Sure she can. :) Sometimes very complicated ones. I was really amazed when she said a passive sentence in the playground (- Look, Mommy, the other swing is taken) or when she talks to her soft toy using present perfect (- What have I told you?). One day she was replaying a Berry and Dolly episode (Gingerbread) that we watch in English.

    The following left her mouth: - I'm making gingerbread with the cookie cutter and then I'll put it out in the winter (sic) to cold (sic). Magpie, (that is me) come and take it away.
    Later in the story: - Don't take away that belongs to somebody else.

    Here is the episode:


    Not only her sentences but her vocabulary is also outstanding. I'm often surprised at how eloquent words she knows. The other day she called a pan saucepan. I don't think I have ever used this word with herOr she can name different kinds of onions: leek, garlic, spring onion as well as varied expressions for the eating process: munch, chew, stuff your face, digest, feed, bite

  10. How do you "teach" her (sic)?
    This is exactly how this question is asked most of the time.

    And the answer is : I do not teach her.

    What I do is to play with her in English just like in Hungarian. We do the daily routines in both languages. I try to prepare everyday and special activities for her which give us a chance to meet a lot of new situations:

    experimenting,
    prepping for holidays of the English speaking world,
    doing fun craft activities,
    - cooking and baking
    - doing housework together
    - exploring nature
    - reading books and singing a lot as well as watching videos

    These are just a few examples. In short, we LIVE our lives in 2 languages.


    +1. How shall WE start?
"The secret of getting ahead is getting started" - Mark Twain

So just start it.

If you want to get some ideas read through the blog... HAHA. Believe me, it'll be much easier to find your own ways. But you can get some ideas here. (Feel free to search for keywords if you're looking for something exact)

Start with some songs that you sing to your child while changing nappies or waking him/her up.

Search some videos online around a topic (cars, shapes, animals, numbers, planets etc.) that your child is interested in and watch them together. You can also explain what you see in the videos.

Learn some rhymes/songs with sign language and play with your munchkin.

Flashcards are almost always fascinating for children, but rather time-consuming to prepare your own home-made ones. On the other hand, our own flashcards are much more attractive to my daughter. You can find really good flashcards online, which you only need to print (and perhaps laminate).
If you don't mind spending some money, you can buy some beautiful ones.

And I haven't mentioned the endless opportunities that books offer to speak and practise a foreign language.

Again, these are some very basic ideas to start with your little one from an early age.

If you have any questions, do not hesitate to contact me either in the comments or via email. You can come an visit my facebook page as well.

Enjoy!

    Earth Day - recycling

    $
    0
    0
    April is dedicated to paying more attention to our planet, Earth. 22 April is Earth Day so we did some activities both in English and Hungarian  to "celebrate OUR Earth" - as E. has put it modestly.

    While we were painting, drawing and selecting we used plenty of special phrases. I'll put together a word list concerning Earth Day and recycling in one of my upcoming Earth related posts.

     But now, in this post, here comes some selective rubbish collection fun:


    Preparation:
      1. I prepared 5 boxes (4 shoe boxes and a blue, IKEA box)
      2. Then I printed, coloured (you can print the bins on coloured paper) and stuck the bins with different labels (plastic, glass metal, paper) on the side of the shoe boxes.
      3. I selected some rubbish items from our recycling bins:
        - beer cans
        - tins
        - a milk and juice carton
        - scraps of paper
        - magazines
        - a glass olives jar
        - a cider bottle (glass)
        - plastic bags
        - bottle tops and plastic bottles
        - yogurt cups (etc.)
      4. I placed the rubbish in the blue box.
      5. I let E. do the selecting.

    First, she was checking what is what, which went with several questions.


    She didn't really know how to make a difference between the different materials although she had been helping sort out the rubbish in our everyday life.

    So I asked her a few questions and showed her the actions at the same time:
    - Can you crumple it up? (And I was crumpling up a piece of paper)
    - Can you tear it? (tearing a piece of the magazine's cover)
    - Is it flexible? (I was smashing a yogurt cup)
    - Is it hard? (knocking my finger against the glass)

    She was copying me while I was showing her crumpling, tearing or smashing.

    And she got the hang of it:


    I also mentioned to her that we need to flatten the cartons so she tried it.


    Having finished we took the boxes to our selective bins and put them in their designated places.


    E. was really excited about recycling and rubbish selection. Before dinner she wanted to watch "recycling videos". And she did. Here they are:

    Peppa Pig - recycling


    Betsy's Happy Earth Day


    Mother Goose Clube - Earth is our home


    What is recycling for children? - HooplaKidz


    Happy Earth Day, Everybody!


    Earth Day - Painting Crafts

    $
    0
    0
    Before the recycling activity we had done some Earth related crafts like this mess-free zip-lock bag painting. Even very small kids can enjoy pressing the paint into all directions.

    What you need:

    - a plastic bag that can be sealed (I used Ikea bags)
    - a paper plate
    - green and blue paint

    Process:

    - put the paint on the paper plate (I put a little more blue than green as there is more water than land)
    - place the paper plate (very carefully) into the plastic bag and seal it
    - seal the bag

    You're child will know what to do right away, I'm sure. If not, tell him or her to press and see how the paint will move everywhere.


    E. realised how much more she can spread the paint with the edge of her hand.


    The first plate had too much paint on so we pressed it against another paper plate. Although it is called a MESS-FREE painting method, with this change everything became grubby.


    I used leftover baby paint so it was easy to clean up.

    E, enjoyed it so much we needed to paint one more Earth.


    Here is the final result:


    Another activity was dot-marker painting of Planet Earth.


    I searched for a picture of Earth and I made white dots on land and sea as well.

    I wasn't surprised at all that she started to count the dots while she was painting them the right colour.


    We ended up writing the numbers and Earth next the Globe. E. "wrote" over my numbers and letters. This is her new "hobby". As you can see she stamped some hearts all around Earth, because:
    - I love you Mommy, and the Earth, too.


    Earth Day 3.0 - sticky Earth

    $
    0
    0
    Today we have made another fun Earth related activity:


    It was a sudden idea so I didn't do the preparation myself. It was a real whole-family task.

    What you need:

    - contact or sticky paper (here in Hungary you can buy it as the sticky cover for school books)
    - green and blue crepe paper
    - scissors
    - permanent marker (preferably blue)

    Optional for the letter:

    - green cardboard strips

    While I was drawing the Globe on the transpatent side of the sticky paper my dear family were cutting the crepe paper into tiny pieces. Then we fixed it on the wall and pulled the paper off.


    Sticking could start. Green went on the land and blue, on the seas and oceans.

    It took a while and we needed to help E. She wouldn't have had patience and persistence to do it all alone.


    When we finishes, E. stuck the letters up. We directed her how to put the letters. Although we did this activity in Hungarian I chose to put on the English word for our planet as it would have been awfully difficult to cut out the accents in 'FÖLD' (i.e.: the Hungarian name for the Globe)


    HAPPY


    DAY!!!


    What do we have to do with AUSTRALIA??? Part 1

    $
    0
    0

    In short: Nothing. In more details: last month (April) we met a lovely elderly couple from Australia who we'd encountered on our honeymoon in Istanbul in 2011. Quite unusual.

    I've taken  the opportunity of their visit to Hungary to introduce Australia to E. She loves planet Earth anyway. She already knows about continents (her favourite is Antarctica) so Australia will be fascinating for her. I hoped...

    Map of Australia


    As E. enjoys looking at maps and our big picture atlas I made a map colouring activity for her. I just printed a blank Australia map with the states drawn on it and after naming each states we coloured them one by one.

    E. is practising her A
    I also wrote AUSTRALIA below the map and E. traced my letters.


    This Australian map puzzle was quite time-consuming to make but the result was beautiful and E. loved it. The link gives you a detailed description how to prepare it. In my version I laminated the pieces. As Queensland and Western Australia consist of 2 parts I sellotaped them together. Then I added sticky back velcro (bought them on sale in Auchan).

    The background is a big blue cardboard

    sticking

    FINISHED!
    I couldn't buy a big enough cardboard to fit Tasmania in the right place. What a pity!

    We can also use this puzzle map in the long run (I also plan to introduce her some cities as well as animals and famous sights. We'll use this map to pin cities, animals and sights up on it and put it on the wall to display)

    She has done the Australian puzzle map several occasions. Sometimes she even said the names of its states.


    Painting the flag


    As the puzzle map gave me a hard time we did not twist the flag project. I printed a blank Australian flag and painted it while we were talking about what is what on the flag


    1. The British Union Jack flag is in the upper left corner - noting Australia's ties to Great Britain
    2. The Southern Cross constellation (5 stars) is on the right side of the flag. The constellation can be seen from everywhere in Australia
    3. The large, white, seven-pointed Commonwealth Star
    Of course, we displayed our pieces  on our living-room door. You need to imaging the composition as I've forgotten to take a photo of it.

    Work in progress
    Let's start!


    Animals of Australia


    First, I created flashcards of the most commonly known Australian animals. (See a printable at the end of the post)

    Kangaroo                                          Duck-billed Platypus
    Koala                                                Cassowary
    Emu                                                  Brown snake
    Wombat                                            Salt Water Crocodile
    Dingo                                                Echidna
    Tasmanian Devil                               Frilled Necked Lizard

    E. has already heard about and seen a kangaroo in the zoo, and also seen pictures of koalas. She knows the (white) wombat from the video titled Red Rabbit, Green Gorilla. She is also familiar with the look of a crocodile or a snake as well as an ostrich, which can remind you of an emu. So first, I showed her 7 flashcards out of the 12.

    As most of the animals had a familiar look I decided to add some information to the flashcards on their backs.

    We had a look at Australia in our Picture Atlas Of The World.


    As on this map flora and fauna is depicted, I showed E. an animal, I said its name and  she needed to find it on the map. When she found it we placed the flashcard on the map and I told her some interesting information (1 or 2 pieces) about the animal (eating habit, place of living, offspring etc.)
    She was laughing at the platypus and found the Tasmanian Devil cute.


    When we finished with this she wanted to see them in real life so we sat down in front of youtube and watched a few interesting videos. (I had prepared for this request so we didn't need to waste time with searching for them)

    The Cow Goes Moo - Kangaroo for Kids


    I'm a Kangaroo

     I'm a Koala


    Bindi and Robert Irwin feature huge salt-water crocodile


    Platypus: Animals for Children

    Bindi and Robert Irwin feature: Wombat


    E. was fascinated by the platypus, mainly its webbed feet. So we needed to draw a Mommy and Baby platypus webbed "feet"


    We'll have a look at the other animals later.

    In the next part:

    E.'s 2nd test of her English; the lovely time in Szentendre we spent together with our Australian friends (M. and B.). - You can read about E.'s 1st real life test here
    E. got some sweet presents (soft toys and books) from M. and B.

    And now here comes the printable Australian animals flashcards:


    What do we have to do with Australia? - Part 2.

    $
    0
    0
    Our Australian friends (who we'd met on our honeymoon in Istanbul) came to Europe for a cruise on the Danube. Their ship left from Budapest and they could visit us as well. They killed two birds with one stone and it was again a great opportunity for E. to "test" her English. (You can read about E.'s 1st real life test here when she met her English speaking cousin)


    As soon as M. and B. arrived at our place, M. and E. hit it off. E. wanted to show her room and her kitchen and what she cooked. I was astonished to see it as she is never so open and welcoming to anyone, not to mention a stranger. There was no language barrier as such. It was absolutely natural for her to use English with M.

    E. got some sweet presents (soft toys and books) from M. and B, which were all Australia related.

    Presents for E. - Books


    At first, she was a bit afraid of Jacko and the beanstalk (I guess because of the scary crocodile), but by now she's okay with it.


    She really loves to identify the Australian animals in the little booklet in the top right corner. As this book also includes the national anthem, we spent one evening after dinner to listen to it on youtube


    (together with several other national anthems, like the British, the US, Irish, Spanish, Colombian and the German)

    Toys E. received from M. and B.
    Her favourite is the platypus (E. named her Platy). And we agreed they can talk in English only. She accepted it without any problem.


    So our friends, M. and B., came to our place. I showed them around our area and invited them for a traditional Hungarian lunch (goulash soup, fried chicken breast in bread crumbs, mash potato plus green salad).

    E. took a nap and as soon as she woke up we left for Szentendre, a town near to Budapest on the bank of the Danube.

    Szentendre in pictures

    Just arrived

    Main Square

    On the bank of the River Danube
    We had a wonderful time together. E. proved her great level of English again. We've been enriched with some books on Australia, some stuffed animals from the country and the time spent with this lovely couple.

    Thank you, M. and B.! We hope to see you again!


    A weak 4th July

    $
    0
    0
    On the 4th July (Saturday) we couldn't really celebrate. There were several reasons for it, but in short: we had been ill. The week before E.'d had some stomach bug which I seemed to catch as well. I had no time to prepare anything for the US celebration whatsoever. Not to mention the busy Saturday we had at a friend's place (luckily we both got better by Saturday).

    So my plan was to do at least ONE 4th July related activity out of the tons of great crafts and fun ideas I've collected on my pinterest board.

    On Sunday morning (5th July) E. woke up with a sore throat. She felt all right in the morning so I thought the afternoon would be dedicated to a US flag craft out of popsicle sticks. After her  nap time she was weak. I asked her if she felt like doing some crafts and she got excited.

    the beginning

    We did try it, however, E.'s temperature was quickly climbing high and she kept saying: - Mommy, you do it. during the activity... Poor thing :( (Every 15 minutes she got Schüssler salt tablets and her immune system reacted very quickly.)

    Finally we (I) managed to finish the flag, but it wasn't much fun.
    Afterwards, I put her to bed, gave her tea and read her some stories. She felt very poorly with high temperature by the end of the day.

    Maybe next year we'll be luckier and do some more 4th July related activities.

    final result

    Just for your information:

    - What you need for the  popsicle stick US flag:


    • 6-8 popsicle sticks (we have wide ones so we used 6)
    • red and white paint + paint brush + a little water
    • a small piece of blue foam sheet (I used leftover foam)
    • 10 white beads (each represents 10 states)
    • glue
    • cellotape
    - How to make it:


    E. wanted some glitter glue on the red ones
    1. paint 5 of the 6 popsicle sticks (3 red, 2 white) and let them dry
    2. cut our a rectangle shaped blue foam and stick the beads on
    3. when the coloured popsicle sticks have dried, turn them upside down in the right order (red, white, red, white, red) then put little glue on the edges and stick them together. I added some cello-tape on the back to make sure they'll stay together.
    4. After a few minutes turn them back and stick on the pole and the blue foam with the beads.
    5. Let it dry - FINISHED

    If you have a younger child (around 2), you should do the cutting and the sticking while your child is painting, but if your child is older you can also give him or her more responsibility, like cutting out the blue foam, pushing glue dabs on it and adding the beads. Still, you'll need to do the final touch, the assembling.

    May the 4th be with you ;)

    Blood sensory bin

    $
    0
    0
    E.'s new focus is on the human body, more precisely on BLOOD. She loves talking about it, seeing it, reading about it and experiencing it. That's why the sensory bin idea has come up.


    She started to be interested in blood when she first saw some blood vessels in the Usborne book titled: What makes you ill?


    This book is about a lot of other things and not only blood: symptoms, germ types, allergies, cuts, lumps and bruises as well as a healthy lifestyle.

    She's been asking so many questions about our blood: Why is blood red? When does it come out of our body? What do white blood cells do? What are germs?

    I remembered seeing a great activity on blood and after having searched for it for days I didn't manage to find so I had to do with what I remembered.


    What you need:

    1.  a big bin (IKEA)
    2. water (about 1 litre)
    3. water beads (red and white - you can buy them at the florist's or order them online)
    4. plastic straws (of 3 different colours. I used purple, black and yellow)
    5. red foam sheet

    What to do:

    1. Put the red and white water beads in two bowls and add half a litre of water each. Let them soak for 5-6 hours or overnight


    2. Cut up the straws into different shapes


      Antibodies (yellow straw pieces) help to kill germs (viruses and bacteria). They are the memory of the immune system.

      Viruses and bacteria (purple and black straw pieces) are tiny germs attacking your body and making you ill.
    3. Cut out rectangle shaped platelets (at first I forgot to make these, nevertheless, E. has been playing with this sensory bin for more than a week now so I had time to add them)


    4. Prepare the beads, the straws and foam rectangles, some measuring spoons or ladles, a let your child explore it.
      spooning the red blood cells
      Red blood cells (red water beads) carry food and oxygen to the cells in our body.

      Adding the antibodies
      Spooning the white ones


      White blood cells (white water beads) fight off germs (viruses, bacteria).

      Plasma (water) makes it possible for the blood to move around our body.

      Of course, before she started I explained what is what. While she was pouring in the "ingredients" I was commenting what she was adding what their functions are in the blood.
    5. Optional: Add some more bowls for more spooning


    It was never ending fun and still is. The beads lasts for weeks if you don't forget to add some more water every now and them.

    Few days ago I found the site where I first saw this idea:  I can teach my child - What is blood made of? They use ping-pong balls for white blood cells... What a great idea!

    Sooooo nice to touch the beads

    Look, Mommy! A virus!

    Antibodies are stuck on the bacteria and burst them
    Throughout the week I added some other tools to fish out the germs: tongs and tweezers:


    Platelets (red foam rectangles) help to block a hole in your blood vessels when you have a cut. They do not let your blood out of your body.


    E. has been playing so much with the blood sensory bin that we've had enough time to cover the blood-related vocabulary both in English and Hungarian. So here is a word list to help you if you decide to prepare this fun activity for your kid. If I'm in a good mood, I might make some flashcards in this field.


    Journal for 3-year olds

    $
    0
    0
    E. got a journal for her name day in July. At first, she wasn't very interested, but now she is getting the hang of it. I presented her with a journal because I want her to draw more, which she doesn't like much. Secondly, we are a journal writing family, and I only hope she'll join the club.


    I got some journal ideas on pinterest, some of which I've collected in a new board.

    So here it is what E.'s first journal look like:

    the cover
    I simply bought a cheap notepad with thicker sheets in it as I don't want markers to leave a stain on several pages. I covered the top with blue cardboard and stuck felt letters on it. (Actually, her first task was to stick letter E in the front. As you see it's a little crooked :)  )

    Some ideas are taken from Teaching 2 & 3 year olds

    There are some drawing, sticking and tracing pages.


    I also added pages like "Draw your Mommy" or " Draw a picture of you". But she hasn't had any intention to look at those pages.


    She was much more interested in the numbers and letters.

    I was also influenced by Mama.Papa.Bubba blog journaling idea.

    Aaaand (beat of a drum) her first drawing of a lovely weekend memory:


    I wrote next to the drawing what she said was memorable for her. (Mommy and Daddy were made by me). I would have been so happy if she'd drawn  a picture of her name day party, but she refused. (although it was a wonderful party with 2 of her friends from the nursery, anyway...)

    I really hope this will be a successful project in the long run and she'll embrace this sort of memory collection. Fingers crossed. I'll come back with some more feedback on journal writing.

    Flower crafts

    $
    0
    0
    This post should have appeared in May the latest when we finished our flower projects. Well, there are tons of flowers around us during the summer time so it's never too late to have a closer look at them.


    Now I'd like to share  2 of our flower activities with you (later, in another post I'll write about some science experiment involving flowers)

    1. Bottle cap flowers 

    I've been collecting bottle tops for a long time and I've only had one or two good ways to use them, like the bottle cap calculator or the colour matching and size sorting activities. (I know, I know there are a number of great ideas out there how to use bottle tops creatively)

    What you need:

    • bottle caps of different colours
    • green straws
    • glue
    • cardboard
    • scissors (optional - not in the picture)

    How to make it:

    Show and explain your child the different (basic) parts of a flower. E. had already known these parts so she named them as I put together a flower.

    we didn't go under the ground so no roots


    Then we both started to work on our flowers. We were talking about what colour petals we chose or if our stem was long or short, if the flower had leaves or not.


    E. used the scissors herself to cut the stems.


    E.'s pic
    Although not in our pictures, we also mentioned that a seed (Can you see in E.' picture the tiny seed on the ground on the left side? It was totally her idea) should go to the ground and with the help of water and sunshine it grows into a flower (hence the watering can on E.'s picture and the sun in mine)


    Mommy's pic


    This is just the first step on parts of a flower. We'll expand the topic later on. I'm planning to prepare some flashcards and worksheets on more detailed explanation on flower parts.

    2. Paper plate flower - a goodbye present

    E. has said goodbye to her créche teachers and started kindergarten in July. We prepared these paper plate flowers as part of her goodbye presents. (You can find the original idea through the link)


    What you need:


    • paper plates (we used 3 for 3 flowers)
    • crepe paper of different colours
    • Popsicle sticks 
    • green paint
    • glue 
    • cello-tape (optional)
    • markers

    How to make it:

    Cut out flower petal shapes of the plates. First, I drew the lines on the paper plate then I started cutting.

    As I know E. has no patience to do long tasks I decided to direct her attention on coloured letters written on the paper plate. The letters showed her where to stick which colour. Her focus was much better in this way.

    I also wrote Thank you! in the middle and letters of her name she could trace.

    I cut up the colourful crepe paper into small pieces beforehand. We ran out of them on the way so she wanted to cut more crepe paper herself. 


    Cutting practice

    This was a great way to relax a little bit as there's lengthy gluing involved.

    Pinching the crepe pieces


    just a dab of glue


    A goodbye flower for Bea néni

    Finally, we painted the popsicle sticks and glued them on the back of the flowers. (I fixed them with cello-tape just to be on the safe side.)

    We did this projects in two goes as it was tiring and long-winding.
    E. was still enthusiastic, even at the second round.

    Unfortunately, I forgot to take a photo of all the three flowers so here is what we made for Kata néni.


    Needless to say, they were all over the moon when they received their presents.
    Have you done some flower crafts or projects lately? Do not hesitate to share it in the comments below.


    To be continued.... with a flower science experiment. Stay tuned!


    August 20th - another Hungarian national holiday

    $
    0
    0


    As we have just returned from our holiday from the mountains, I haven't had time to prepare something special for today. 20 August is the 2nd biggest national holiday in Hungary. (I've already collected some activities for the first most important one i.e. 15th March).

    We also call 20 August Saint Stephen's Day or the commemoration of the Foundation of Hungary as a state or "the day of the new bread". If you're interested in the background of this Hungarian holiday, please check the links.

    So quickly I put together some fun crafts connected to our modest celebration after having unpacked our suitcases and started the washing machine.

    On the way home sitting in the car, E. could see the Hungarian flag everywhere. She got quite excited  and pointed at all of them shouting: Hungary... so we made this flag out of crepe paper (red, white and green) and a piece of wooden skewer. You need some glue and that's all.


    What you need are in the pic:


    • crepe paper strips (red, white, green or the colours of your country's flag)
    • skrewers
    • glue


    Place one piece of crepe paper under the skewer and add some glue


    Then roll the crepe paper on the skewer


    Repeat it with the other colours one below the other. Let it dry for a few minutes


    The easier the craft is the more fun you'll have afterwards.


    As we celebrate 20 August with massive fireworks over the River Danube at night, I thought we could create our own fireworks at home. We are not going to watch it in person as it is always extremely crowded and the weather has rather been capricious lately.

    I've taken some ideas from 4th July celebrations. Check out the pinterest board on the topic.
    This exact fireworks straw paint is more than fun to make.

    On the link above you can find the detailed description, but here it is in short:


    • stretch and bend 7 straws and cello-tape them together (I made 2 sets)
    • prepare red and green paint in  two plates
    • provide a white sheet
    The painting can start. Your child needs to dip the straws into the paint and make prints with both colours.


    Even Daddy had fun :)


    Our own fireworks at home

    Did you celebrate 20 August somehow? Let me know what you did together with your little one in the comments.

    Viewing all 123 articles
    Browse latest View live


    Latest Images